Showing posts with label tutorial. Show all posts

Monday, October 3, 2016

Thermofax Screen Printing - Repeat Printing Part 1

Hi everyone! I’m Terri Stegmiller and for the month of October I am going to share how I repeat print with Thermofax screens. In today’s post I will share how I prepare my screens and work surface.

When I first thought about printing in repeat to create some fabric yardage, I researched, searching the Internet, and found very little information on the process. There are definitely people who are doing this, but as far as tutorials go, not much to be found. What I did find, I soaked up and filled in the blanks with my own idea of how it was done. The process I started with is definitely not the exact process I use today, but with most techniques we tend to tweak them as needed to perfect them for our needs and surroundings.

The process I’m going to share in my October posts is one I use with both Thermofax screens and larger silk screens. While these two types of screens are used in the same manner they are created differently. My focus here will be on Thermofax screens. There are online sources where you can get your images made into custom Thermofax screens. One source is Etsy.com. You will find some Etsy sellers that offer this service.

My Thermofax machine

To create a Thermofax screen, I start with a doodle or drawing that I have scanned into my computer. Using Photoshop, I edit the image by creating a high contrast black and white image, size it to the dimensions I desire, and create a repeating pattern. I typically create what I call a straight repeating pattern or an offset repeating pattern and you can see examples of each of those below.


When you have your Thermofax screen made, it typically comes with a taped edge to aid in the use of the screen. You can use it like this with repeat printing, but I prefer to adhere it to a wood frame. I find that the wood frame provides a more stability for setting up and maintaining the repeat across the fabric.

Be sure to use a frame that is about the same size or larger than the taped screen. I like to use temporary tape, such as painter’s tape, to adhere the screen to the frame so that I can remove the screen and use the frame with other screens.


When taping the Thermofax screen to the wood frame, try to align it so that the edges of the design are perfectly parallel with the wood frame edge. This will help you achieve a more successful repeat. I like to use the grid lines on my cutting mat to aid in this alignment.


When taping the screen to the frame, be sure to tape around all edges on the bottom side so that no printing ink/paint can seep through and mark your fabric.


After you have taped your screen to the frame, you will need to prepare your work surface. I like to use a table that is 6 feet or longer. The tables I’m using are ones that fold in half for storage so they don’t take up so much space when not in use. A smaller table can work too, or you can push two smaller tables together to create a longer table. In my demonstration photos, I am working in my studio space inside my house and I have two tables pushed together where I am working.

On top of my table, I use a printing pad created from a sheet of foam insulation that I bought at my local home improvement store. These sheets typically are around 6 ft. by 8 ft. in size but you can easily cut them to the size you need with a box cutting blade or craft knife. I like the foam sheets that are thick, about 1” or more, because I pin into them and I don’t like when the pin goes all the way through the sheet and hits the table. I need the pins to be flush with the printing pad surface.


After cutting the foam sheet to size, I cover it with batting and then a layer of fabric. I usually use a layer of cotton duck cloth because it is very durable, but you can use inexpensive muslin if you prefer. I adhere the batting and fabric layers to the foam sheet by wrapping them around to the back of the board and taping with duck tape.

The next thing I do to prepare my printing surface is to add tape lines, using painter's tape. You can see in the photo below how these are placed on the printing pad. I use a long metal ruler to help align the tape so it is as straight as possible.


The tape line across the end (near the bottom of the photo above) can be placed on the right end or the left end of the printing pad. It just depends on the direction you prefer to work. I like my fabric to feed from the left, so I place the tape on the right end. This is an alignment aid which will make more sense when explained in a later post.

Coming up in Part 2 of Repeat Printing with Thermofax Screens - fabric preparation


Tuesday, June 14, 2016

Surface Design in Plein Air ~ Rusting Fabric with Maggie Vanderweit!

Carol R. Eaton here for post #3 of the Plein Air Series! I'm excited to share a tutorial on rusting fabric! Maggie Vanderweit is our guest artist who was kind enough to allow us a peek into her outdoor space and share her approach! 
You will never look at old rusting objects in quite the same way again! 
Maggie lives in southern Ontario, Canada so her ability to work outside is limited to May through October. Her studio is in a walk-out basement with access to her garden and a covered stone patio. Maggie says when she started with surface design 5 years ago being outside was much safer and more comfortable allowing her to work freely and make a mess! When Maggie works outdoors she is surrounded by the sounds of birds and the smells and sights of the garden. Everyone's outdoor space will be unique; the goal is to bring your supplies outside into an area that inspires you and allows you the freedom to fully engage your creativity. Maggie created an inspiring space while living in a typical town neighborhood so don't feel like you can't work outside if you don't have access to a large space; it just needs to feel good to you. 
Maggie says when rusting fabric or eco dyeing the heat, steam, fumes, and dripping fabric on the drying racks are much easier to manage outside! She has direct access to a hose for rinsing the fabric and filling her pots. For her eco dyeing projects she keeps oven mitts, tongs and sticks on hand to poke, stir and transport the hot wet cloth. Maggie uses a pea gravel section of her space to soak, rinse and dry things flat because it drains easily. She also has access to a long covered deck with concrete tables so she doesn’t worry about the heat of the hotplates or the vinegar/dye stains damaging anything.
When in full "dyeing mode" Maggie will stay outside everyday for hours at a time. 
To get started find some interesting rusted objects. When I began to look for items I was surprised to find many objects are made to prevent them from rusting - but keep searching and you will find some treasures!
You will also need need fabric, salt, a solution of 1-part white vinegar and 1-part water.  
 Soak the fabric in the white vinegar/water solution.
Wrap the rusted objects in fabric and cover with plastic for a minimum of 24 hours. 

TIP: Maggie will sometimes incorporate botanical materials and powdered dyes in her work. These eco dyeing projects require boiling for long periods of time - all done in her outdoor space! 

The rusting oxidation process must be stopped or it will destabilize the fabric.
Unwrap the objects and place the fabric in a solution of 4 gallons warm water and 1/2 cup of salt. 
Soak for 15 minutes.
Squeeze out excess water and rinse until all the salt is gone - hang to dry.

Have fun with your rusted fabric designs!
Work with the natural design elements to see what they will become.
Try Maggie's tip of eco printing in your outdoor space. There are many blogs to learn more about this process.  
Maggie feels each piece of cloth is unique and says the results are unpredictable. Maggie equates unwrapping each bundle to opening a Christmas gift! Her mantra is to create a space where you feel able to spread out and play with abandon! I agree... I'd love to see photos of your outside space... a condo deck... a picnic table in a side yard - what makes you happy? 

Rusting is a lot of fun... please share your results on the blog! If you have any questions feel free to start a dialogue and we can all get in on the conversation. 

Don’t forget to comment on the blog for a chance to win a pack of fat quarters using all the techniques we’ll discuss over the month of June = swoon! 
The winner will be announced June 30th

All photos on the blog were provided by Maggie.

Maggie is a contemporaneity textile artist, author and travel photographer. She recently published, Stone Threads available from her website at the end of this month. 

To follow Maggie go to:
https://www.facebook.com/maggie.vanderweitmeredith 

Next week mixed media artist Lori Hancock McCown will join the conversation sharing work inspired by working outdoors!


Monday, May 30, 2016

Metallic Foil vs Metal Leaf

On the surface, metallic foil and metal leaf serve the same purpose: to add a metallic effect to your projects. However each material has strengths and weaknesses so there may be some uses that are more appropriate for one over the other. An informed decision will lead to a successful project, so I'll discuss each material in depth below.


Metallic Foil

Pros:

  • Extremely durable 
  • Can be washed by hand or machine
  • Can even be dry cleaned
  • Wide range of colors and visual textures available
  • Simple to use 
  • Easy to sew through

Cons:

  • Slightly plasticy-looking
  • More artificial and less genuinely metallic in appearance

Methods of application:

  • Foil glue
  • Gel medium
  • Any fusible product - fusible web, fusible powder, fusible thread, et al

Care of applied foil:

  • Machine or hand washable
  • Dry cleanable
  • Avoid severe abrasion
  • Do not iron directly on foil

Suggested uses:

  • Art garments
  • Bags and totes
  • Functional quilts
  • Decorative quilts
  • Fiber art


Metal Leaf

Pros:

  • Authentically metallic appearance
  • Lovely organic quality to application (imperfectly perfect)
  • Fairly simple to use 
  • Easy to sew through

Cons:

  • Delicate and more fragile during application and after
  • Can not be washed by machine or dry cleaned
  • Copper and gold leaf will get a patina over time, silver will not patina

Methods of application:
  • Gel medium is most highly recommended on fabric

Care of applied foil:

  • Spot clean by hand only
  • Avoid any abrasion
  • Apply a watered-down coat of gel medium to copper or gold leaf to prevent oxidation

Suggested uses:
  • Fiber art


I hope this helps you make a decision between metallic foil and metal leaf the next time your project needs a metallic effect. If you have any questions that I haven't answered, please ask them in the comments.

If you would like to win a set of 4 metallic foil colors, there will be a drawing from among all of the commenters on my posts this May on Friday, June 3. Please make sure there is a way to contact you in your comment!

~Jane Davila

Sunday, May 29, 2016

Metal Leafing on Fabric

There is nothing like the shimmer, glimmer, and sheen of real gold, silver, or copper leaf!

In my last post I showed you how to apply metallic foil to fabric a number of different ways. Today I'm going to show you how to apply metal leafing to fabric. Metal leaf, available as gold, silver, and copper, is an extremely thin sheet of real or imitation metal - for example, most silver leaf is actually made of aluminum, which, unlike real silver, never tarnishes.

Store the fragile metal leaf in the original packaging to protect it.
Metal leaf is available in art supply stores and many craft supply stores.

Supplies:
  • Metal leaf 
  • Gel medium
  • Paintbrush for applying gel medium (I use a small foam brush)
  • A soft, full paintbrush for removing excess leaf
  • Parchment paper
  • Iron and ironing board
  • Fabric 
  • Optional: freezer paper to create a stencil or mask, a commercial or original stamp

Although metal leaf is applied to other surfaces with a special glue,
gel medium is the ideal adhesive for applying the leaf to fabric.
It's archival, flexible, has no odor, and is simple to apply.
For this demonstration I'm using a stamp block that I created for printing
with acrylic and adhesive foam, a soft brush, and a small foam brush.
Instructions:

1. Using the foam brush, apply an even coat of gel medium to the stamp. Press it onto the fabric.

Apply even, firm pressure to the stamp for a good impression.
2. Immediately lay one sheet of metal leaf carefully on top of the wet impression. Tap it into place. Use the separator sheets between the leafs to transport it to the fabric to prevent it from crumbling or breaking apart. Metal leaf is EXTREMELY fragile and must be supported as it's moved.

Don't be concerned about small tears or breaks in the leaf, just be
certain to cover the entire surface of the wet impression.
3. Wait 10 minutes for the gel medium to dry and then cover the leaf and fabric with a piece of parchment paper. Press firmly with a hot iron.

The parchment paper protects the iron from excess gel medium
4. Allow the fabric to cool completely - approximately five minutes.

The gel medium acts as an adhesive to hold the leaf to the fabric
5. With a soft brush, begin brushing away the excess leaf. The areas where the gel medium was applied will not be affected by the brush.

Save the small bits of excess leaf in a container for another project

6. The final result. The beauty of leafing is that it is "perfectly imperfect" - there are variations in the edges, in areas that don't take the leaf as well, etc.

Depending on the texture of the fabric, the weave may come through
the leafing, enhancing the final result.
Variations: 
  • Create a stencil or mask with freezer paper. Iron the freezer paper to the fabric. Apply gel medium to the openings of this stencil or mask. Peel off the freezer paper and immediately apply the leafing to the fresh, wet medium. Allow to dry, cover with parchment paper, and press well with a hot iron. Brush any excess leaf away after the fabric has cooled completely.
  • Apply gel medium freehand with a paintbrush. Add leafing sheets to the fresh, wet medium. Allow to dry, cover with parchment paper, and press well with a hot iron. Brush any excess leaf away after the fabric has cooled completely.
  • Mix different colors of metal leaf to the same project.
  • Apply the leftover small bits of metal leaf to wet medium for a multicolored, textured effect.

Note: Fabric that has had metal leafing applied to it can not be washed without damaging the leafing. This makes metal leafing ideal for art projects and not practical for functional projects.

Please leave a comment if you would like to win a package of metallic foil. Tell me how you would use metal leafing in your work, or how you might already have used it!

~ Jane Davila

Monday, May 16, 2016

Foiling on Fabric

Happy May, Printed Fabric Bee fans and friends from Jane Davila!

Small fusible squares with multicolor metallic foil

This month I'm going to be showing you some fun ways to add metallic foils and metal leafs to fabric for shimmer and sparkle on your projects.
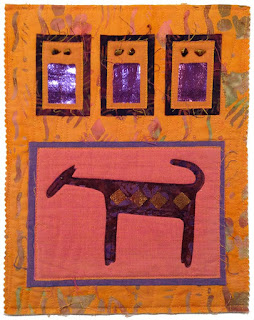
purple metallic foil squares added with fusible web

First up is metallic foil added to fabric with fusibles. Metallic foil intended for use on fabric is a clear cellophane sheet with a very thin metallic film attached to it. If you place a fusible product (web, thread, or powder) on your fabric, cover it with the foil, and heat it with an iron, you can permanently affix the foil to your fabric. Check out the tutorial below for more details, hints, and tips.

copper and purple metallic foil added with fusible web

Here's a basic tutorial of how to apply metallic foil with fusible thread. The same technique applies to other fusible products.

Step one:
Cut and lay a length of fusible thread on the surface of your fabric.

There are several brands of fusible thread on the market including Superior and YLI.
The thread MUST say it's fusible thread.

Step 2:
Cover the thread with a piece of metallic foil. Important: the foil must be placed so that the finished color is facing UP. The back of the foil will be fused to fusible thread, so the colored side must be facing up and away from the fabric. When the foil is fused, it will release from the clear cellophane.

Metallic foil facing up, fusible thread underneath

Step 3: Cover the metallic foil with a piece of parchment paper to protect both the foil and your iron, and press well.

A hot iron works best, but consult the instructions on your specific
fusible product for the optimal temperature

Step 4: Important! Allow the foil, fusible, and fabric to cool completely before this step. Slowly peel the metallic foil away from the fabric. The fusible thread should have melted and will be adhered to the foil. All other areas of the foil will still be affixed to the clear cellophane sheet and can be reused.

That is not a reflection - my hands were blue from painting fabric
just prior to this shot for another project! #studiohazards

Step 5: If the foiled area is not perfectly flat and smooth, cover it with parchment paper, re-iron, allow to cool completely, and remove parchment paper to reveal perfectly flat and smooth foil.

Foiled fabric is extremely durable and can be machine washed and
even dry cleaned, making it perfect for art garments as well!

Here are some variations on the technique of metallic foils with fusibles:

Fusible tape, available in a variety of widths, is used to adhere
metallic foil to fabric

Fusible web, like Wonder Under, can be cut into shapes,
applied to fabric, and covered with metallic foil.

Hand sew fusible thread into a design, like a house, and
cover with metallic foil. Each line on this house is one
single stitch for a graphic appearance.

Create metallic stars stitching by hand with fusible thread
and covering with metallic foil.

Use fusible thread in the bobbin of your sewing machine
to create stitching lines that can be covered with
metallic foil. Remember to use parchment paper both on the top
and the bottom when fusing to avoid making a mess.

Add more than one layer of fusible thread and one color
of metallic foil for a layered effect.

Sprinkle fusible powder, like 007 Bonding Powder from Bo-Nash,
on your fabric, cover with metallic foil and parchment paper,
and fuse for a beautiful sparkle effect. Two colors of foil are shown here.

Snip fusible thread into small pieces and foil over it.

Combine snippets of fusible thread and a sprinkle of fusible powder
with metallic foil for an interesting surface design effect.

I'll be giving away a set of metallic foils to one lucky reader at the end of the month. Please leave a comment with a way to contact you and tell me how you would use metallic foil in a project!

Next up - gold, silver, and copper metal leaf on fabric. Stay tuned!