Sunday, July 31, 2016

Paintstik Prizewinner!


Thank you , everyone, for reading my posts and leaving such nice comments! Of course, there can be only one winner. Drum roll, please....


Congratulations, uptowncraftworks! I hope you have a lovely time playing with your prize. Please email me with your snail mail address so that I can ship this out to you.


Friday, July 29, 2016

Paintstiks & Stencils

Welcome back to my third and final blog post for my term as Queen Bee. (I just had to use my title one last time!) Let's talk about how to use your Shiva Paintstiks with stencils.

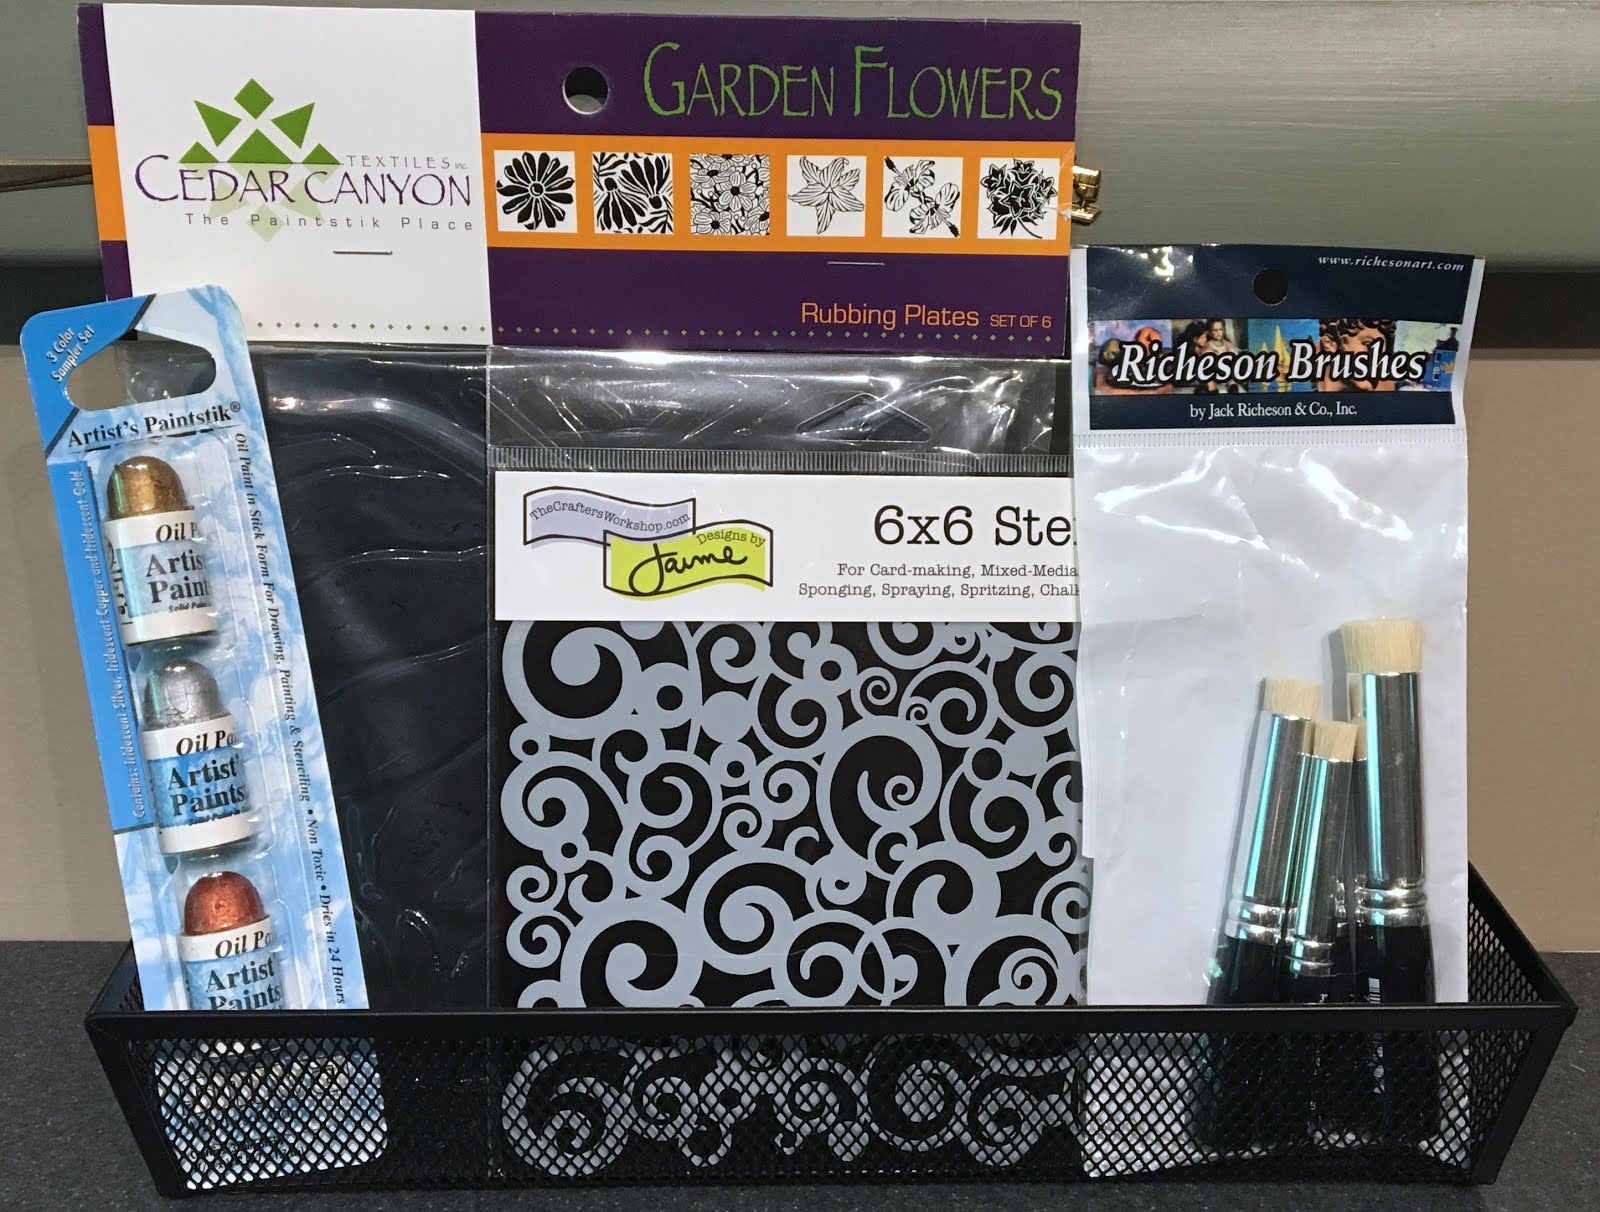
To get set up, you'll need your Paintstiks, mess management tools (see most recent blog post), fabric, your Grip-n-Grip, and some stencils. You may need a knife to open your Paintstiks if it has been awhile since you used them. Go ahead and round everything up. I'll wait right here.

If you've been using your Grip-n-Grip heavily, you may have noticed that it's not as sticky or grippy as it once was. No worries. Cleaning your Grip-n-Grip is fast and easy. Plunk your Grip-n-Grip into your kitchen sink (or other sink with a large flat bottom) get it wet, and rub some Dawn dishwashing soap or other degreasing soap on both sides of your mat. Rinse well. To hurry the drying process along, take it outside or to a shower stall and give it a good flick to dislodge the water droplets. It'll dry pretty quickly. Do not dry it with a dish towel. Ask me how I know. Sigh.


To set up for using stencils, place your mat on your work surface. Next, add your single layer of fabric and smooth it down on top of your mat. It should stay pretty stable.

There are so many stencils on the market! It's hard to choose where to spend my money. While I have a few stencils that are focal points, I like to collect patterns that will work will as layers in bigger, more complex surface design. For this demo, we're working with a bit of a mix; these flowers could be a focal point, or you could layer with them. The dots and checkerboard are immensely useful.


Once you choose your stencil and decide where to place it, I like to add a hinge of painter's tape. Just run a length of painter's tape half on the stencil (don't block any of the openings) and half on the fabric. When you are painting, you can hinge up the stencil, check your progress, and return the stencil to the same spot to continue working.

Tape versus spray adhesive: If you like spray adhesive, go ahead and use it on the stencil to keep in place as you work. I rarely use it for several reasons. The smell can trigger migraines and nausea for me, the spray is generally bad for the environment, and cleaning up the stencils is harder with adhesive on them. Also, if you plan to move your stencil around as you add layers, the adhesive can pick up paint that's still wet and spread it to other areas of your work. It's up to you.

While we used the Paintstiks directly on the fabric with rubbing plates, I don't do that with stencils. To start, you'll need a palette. I like to use lids from take-out containers. Cover the inside of the lid with painter's tape. The grippy nature of the tape will give you enough texture to transfer paint onto your new palette. When you're finished, you can peel off the tape and throw it away. Clean up is fast.


Stencil brushes are not all created equal. If you used to paint borders around the top of your wall with liquid-ish paint (Remember the 70's?), those brushes will not work here. Look for really stiff bristles. Sometimes you can cut the brush bristles shorter to make them stiffer, but it's just easier to have a selection of appropriate brushes on hand. Cedar Canyon makes four sizes and I have scads of them. (In fact, there's a set of four in the prize package. Leave a comment to enter...) Choose the size that is small enough to get paint into the stencil holes and large enough to finish the project in a reasonable amount of time. There's no right answer.


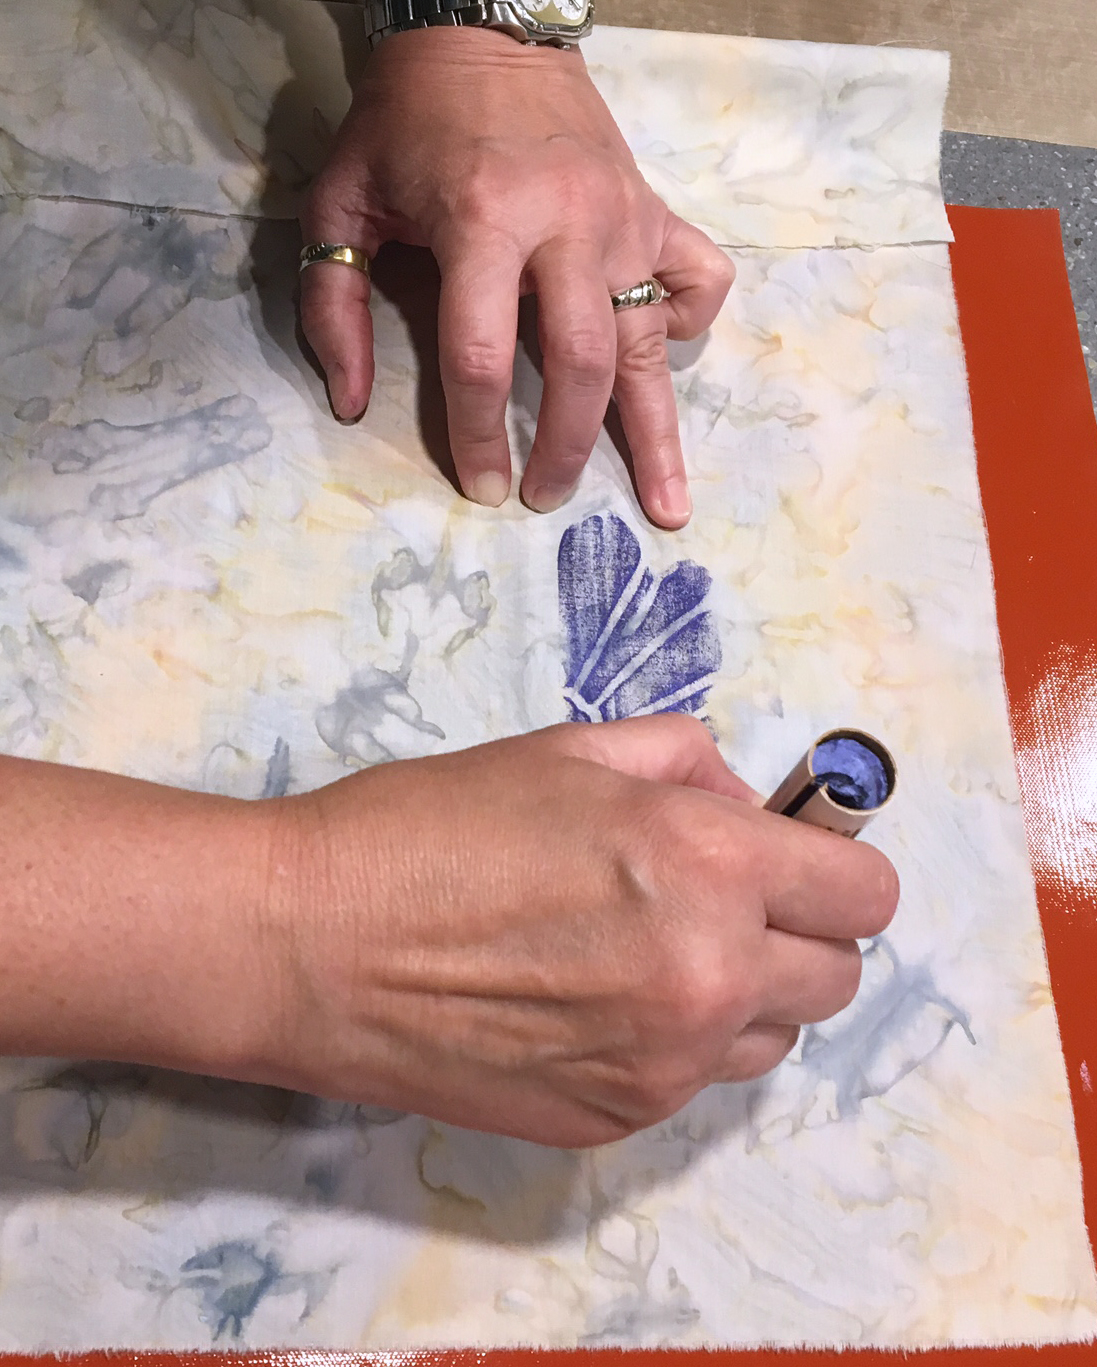
Using your Paintstik like a crayon, scribble some paint on the tape on your palette. Remember, you need to remove the skin from your Paintstik before you use it. Load your brush from the palette and remove any bits of paint skin or globs of paint. Go to the stencil and start filling in the holes.


One advantage of the Paintstik's consistency is that you don't have to start on the outside and draw the brush in. Liquid paint could run and spread; Paintstiks will not. To fill an area, I often paint in circles and scrub the paint into the fabric. The Grip-n-Grip will help keep the fabric in place.


If you're working with a larger stencil and you only want to use part of it, painter's tape is your friend. There's a reason they call it masking tape! Place strips of tape over the parts you want to mask and remove that tape when you're finished.


Keep in mind that you may want some areas to be darker and others lighter. If this is the case, be intentional with your brush strokes and keep an eye on color value. In the larger flowers, below, I chose to keep the darker values at the edges and the lighter values in the center. That leaves my options open for more paint or some embellishments.


As you work, use the hinge to check your work. I think this layer is done, so I'll take the stencil off and look for what I want to add next. 


If one added layer is good, won't two be better? I'm told by my art quilt students that one of the hardest decisions to make is to decide when your work is finished. In this case, I'm using two of my favorite go-to stencils (one at a time) to add balanced but asymmetrical layers. If you're not sure you're done, live with it for a while.


Finished. This isn't a masterpiece, but I hope it shows you what you can do with Paintstiks and the stencils you may already own.


Do you remember the big flower I did in the last post with a rubbing plate? I added a bit of texture by putting a piece of construction fencing under the fabric and using that as a rubbing plate, too. Here's what happened when I stenciled another layer with a different color. As you play, you'll develop favorite combinations and this will all be so easy, you'll wonder what took you so long to get started.


Here's one last piece of eye candy.


I did this with one stencil, two Paintstiks, and two brushes. I used a mottled light grey fabric for the background and that's how I got the tree trunks. I used a lovely cobalt blue for the sky and was careful about color value (darker at the top, filtering to a lighter value at the bottom) to give the impression of twilight. The black knots in the trees required a different brush; I cut a stiff flat brush to an angle so that I could get into those tiny areas.

Thanks for reading my stuff this month. I have had a great time sharing my love of Paintstiks. If you want to keep in touch, come on over to my blog or my website or email me. I'm also on Pinterest.

Leave a comment to be entered into the drawing for the fabulous (or at least pretty neat) Paintstik Prize Package.


Thursday, July 28, 2016

Paintstik Rubbings for Texture and Images

The first time I played with Shiva Paintstiks, I had a set of metallic minis, some dupioni silk, and absolutely no idea what I was doing. Please learn from my foolishness.
  • You're playing with a solid form of oil paint. Dress accordingly. 
  • Prep your work area for potential mess. Cover your worktable with plastic and have a place for trash that's easily accessible and will corral any errant Paintstik skin. I call this mess management.
After my first experience (and after I cleaned up the silver bits and pieces that decorated our hardwood floors), I went in search of information. I bought Shelly Stokes's book, Paintstiks on Fabric, and Paintstik Inspirations, an absolutely amazing DVD by Laura Murray. I recommend them both; get them at Artistic Artifacts.

When you open a pack of Paintstiks, you'll notice there's a skin covering the yummy oil paint goodness inside. You need to remove the skin before you can use the Paintstik. Here's how:
  • Gently pry open the paper tube around the Paintstik so that you'll be able to move the Paintstik up as you use it. Leave the tube on the Paintstik; just make sure you'll be able to slide the Stik. 

  • With an old knife devoted to art (and NOT food), cut or peel off as little skin as you can without losing too much of the paint inside. You'll see a difference in the sheen of the Paintstik when you get through the skin. The paint is shiny; the skin is not. (If you feel like you're wasting paint and you have a whole lot of time, feel free to try to reconstitute the skin with some linseed oil. I just don't have time for that.)

  • If you've used the Paintstik recently, you may be able to remove the skin by covering the tip of the Paintstik with a rag or paper towel and gently twisting. I've never had this work on a fresh, new Paintstik. 

  • MESS MANAGEMENT: Make sure all of the Paintstik skin and crumbs make it into the trash. 
Hint: As I work, my hands get covered with paint. I try to keep them clean to avoid spreading color where I don't want it. Laura Murray recommends baby wipes for your hands. I use unscented baby wipes on my hands and the occasional stencil.

When I work with Shiva Paintstiks, I generally use them to create rubbings or with stencils. Today, let's talk about creating rubbings.

To set up your workspace, I recommend starting with a Grip-n-Grip No Slip Mat. It will give you a great non-skid work surface that will keep your rubbing plate in place. (And you'll find lots of other uses for it!) Pat it to be sure it's securely in place. Both sides grip, so you are making sure of the temporary bond between the Grip-n-Grip and your work surface.


Next layer: rubbing plate! Pat it into place as well, to ensure it will stay put.

Lots of students ask which side is up. Rubbing plates generally have no labels to give you a clue. Here's how I determine which side the manufacturer intended as the "right" side. Place the rubbing plate flat on a table. Now, look at the lip around the rubbing plate. Is it absolutely flat against the table? Yes? That's the side to use. If there's a little space (maybe 1/8") between the table and the edges of the rubbing plate, that's the flip side. It will still work for rubbings, but the image will be different and may not be as crisp as you would expect.


Now add your fabric. It may stay on place better because of the Grip-n-Grip, but don't rely on it. Here's where you start being a bit careful about keeping things in place.


Once the fabric is in place, make sure you know where the edges of the plate are. In this shot, the tips of the fingers on my left hand are resting against the edge of the plate, which is under the fabric.


Generally, I pull the Paintstik across the surface in one direction, careful to keep the fabric from shifting. How hard should you press? Hard enough to get color on your fabric, but not hard enough to push or pull your fabric into distortion. It may take a little time to get the feel of this.


Do NOT time travel back to kindergarten where you scribbled in all directions to complete a rubbing with paper and crayons. That will distort and move the fabric. Of course, if that's the effect you want...

Does the rubbing need something more? Add layers!

Don't limit yourself to commercial rubbing plates. They're great for a lot of reasons, but there's so much more out there. For this flower, I wanted to add a little structure and background, so I used a piece of construction fence. Slip the texture you want to add under the fabric and add color by rubbing the Paintstiks on the areas where you want it.


Sometimes, paint makes its way through the fabric onto your rubbing plate. Clean it with a baby wipe or a paper towel (or rag) and some orange based degreasing liquid cleaner. I like Citrasolv, but ZEP makes a good one, too. It's affordable, non-toxic, and safe to dispose of down the drain. In a pinch, I've successfully used Dawn dish detergent.

In the next post, I'll add one more layer with a stencil to make this little flower a little more interesting. For now, here's another rubbing...


And here's what you can do with a selection of rubbing plates, black fabric, metallic Paintstiks, and some painter's tape. Fun!
 

Don't forget to comment so that we can enter you into the drawing to win this lovely Paintstik starter kit. Do you see where it says "Garden Flowers" on the Cedar Canyon label? Those six pictures are the rubbing plates included in this prize package. 


Thursday, July 14, 2016

All About Shiva Paintstiks


I love Shiva Paintstiks. I really do. My Paintstik class is one of my favorites to teach. Often, students admit they have hoarded collections of Paintstiks but never opened the packages! Somehow Paintstiks seem too intimidating to use. This month, my posts on this blog will be all about Shiva Paintstiks – what are they, how you can use them, and what supplies will be useful.


Paintstiks are basically oil paint crayons. They consist of three ingredients: pigment, wax, and linseed oil. The pigment provides color, the wax provides structure for the Paintstik (and makes it sort of like a crayon), and the linseed oil helps transfer the pigment to the fabric. 

I did this quick study with a rubbing plate for the flower, construction fence for the grid, and a stencil for the dots. While the flower alone was fun, more layers can create an interesting overall image.

After you apply the Paintstik to your fabric, the paint needs to dry or cure. The linseed oil will dissipate.  This can take a few days or even longer, depending on the humidity in your location. I sometimes take my project down to our laundry area and hang it near our dehumidifier to speed the process along.


You can heat set Paintstiks on your fabric and then you are safe to throw the painted fabric into the washer and dryer. Never dry clean a project that contains paint from Paintstiks. The dry cleaning fluid will ruin your paint – enough to know there was an issue but not enough to completely remove the paint for a fresh start. So, no dry cleaning. 

Heat setting layout
To heat set, layer parchment paper, paper toweling, and your painted work, paint side down.

To heat set, I use my iron, parchment paper, and some paper towels. set your iron for the fabric type. Cover your ironing surface with parchment paper to protect it and then I layer a few paper towels on top of the parchment paper. With your painted fabric face down (paint side on the paper towels), press each section of the fabric for about 15 seconds. 

I created this fun Paintstik panel with two Paintstik colors, one commercially available grey cotton fabric, and one purchased stencil. I'll share how I did it in my third post for this month: Paintstiks & Stencils

If you are in a hurry and you don’t have time for the paint to cure, you can heat set your work early, but expect to lose some pigment. When you heat set early, you’ll see the telltale oil residue on the paper towels. You’ll also see the color you lost. 

I painted this fun piece with a single stencil on black cotton using iridescent Paintstiks in metallic colors.

I like to use Paintstiks with rubbing plates to create texture and with stencils to create more refined images. I especially like mixing up these two techniques for a more complex effect. In the next post, I’ll show you how to use Paintstiks with rubbing plates. I’ll also share one of the most useful tools I have in my studio and instructions for cleaning up.

The prize for this month's drawing: a set of 6 rubbing plates, one stencil, four stencil brushes, and a set of iridescent mini Paintstiks in metallic colors.

Would you like some Paintstiks of your very own? Comment on any of my Printed Fabric Bee posts this month and you will be entered in a drawing to win some cool Paintstik stuff! I also invite you over to my website, www.MoonlightingQuilts.com, and my own blog, www.MoonlightingQuilts.Wordpress.com.