
"Yo-Yo Flowers"
Susan Edmonson
Hey Ladies! I am thrilled to be in this group of such talented artist! However you guys are much more techie than I am, so I hope I can get this done right so you can all see it. I'll give you a brief introduction of myself. I live in Concord, NC close to Charlotte, married for nearly 39 years and have two sons, two daughter-in-laws and one sweet little 2 yr. old grandson. I'm hoping for more of the latter!
Most of the work I do is embellished in a whimsical way. I LOVE to embroider by hand, not machine! I am a Bernina Girl through and through..... I just got another little 350PE Tula Edition to travel with. I already had one other DragonFly 350, but felt I needed a backup for the other backups! Yes, many machines. :)
The project I would like to share is dear to my heart and totally expresses all of my loves (well most). I have been teaching for over 26 years and this has been one of my very favorite classes. It is one little Prayer Flag from a series of many other little ones that can be strung together with ribbons. I also am very much a natural fiber girl, cotton, linen, wool, silk, etc. So all of my parts are one of these fibers or I probably don't use it.
I hope you enjoy this and they are great gifts as it is getting close to the Holidays!
For the give-away I have for you a kit of this project and a little hanger and the threads I use to embroider with. I love the Painter's Threads Pearl Cottons!

Step 1: Background
Cut a background fabric in a slightly weird rectangle about 4 1/2" x 6" or so. I use Cotton Organdy that has been hand dyed, but not by my hands, Fiber On A Whim's hands. Next cut a piece of Quilter's Dream Fusion Batting Request weight slightly smaller than the background fabric. Note: If you haven't tried this fusible batting it is AWESOME! I use it for all my quilting on my Bernina 820, not a long arm though. Fuse the batting to the back of the fabric. This is the stabilizer. There will be another fabric placed on the back later after all the stitching is completed. Lay this aside for now.
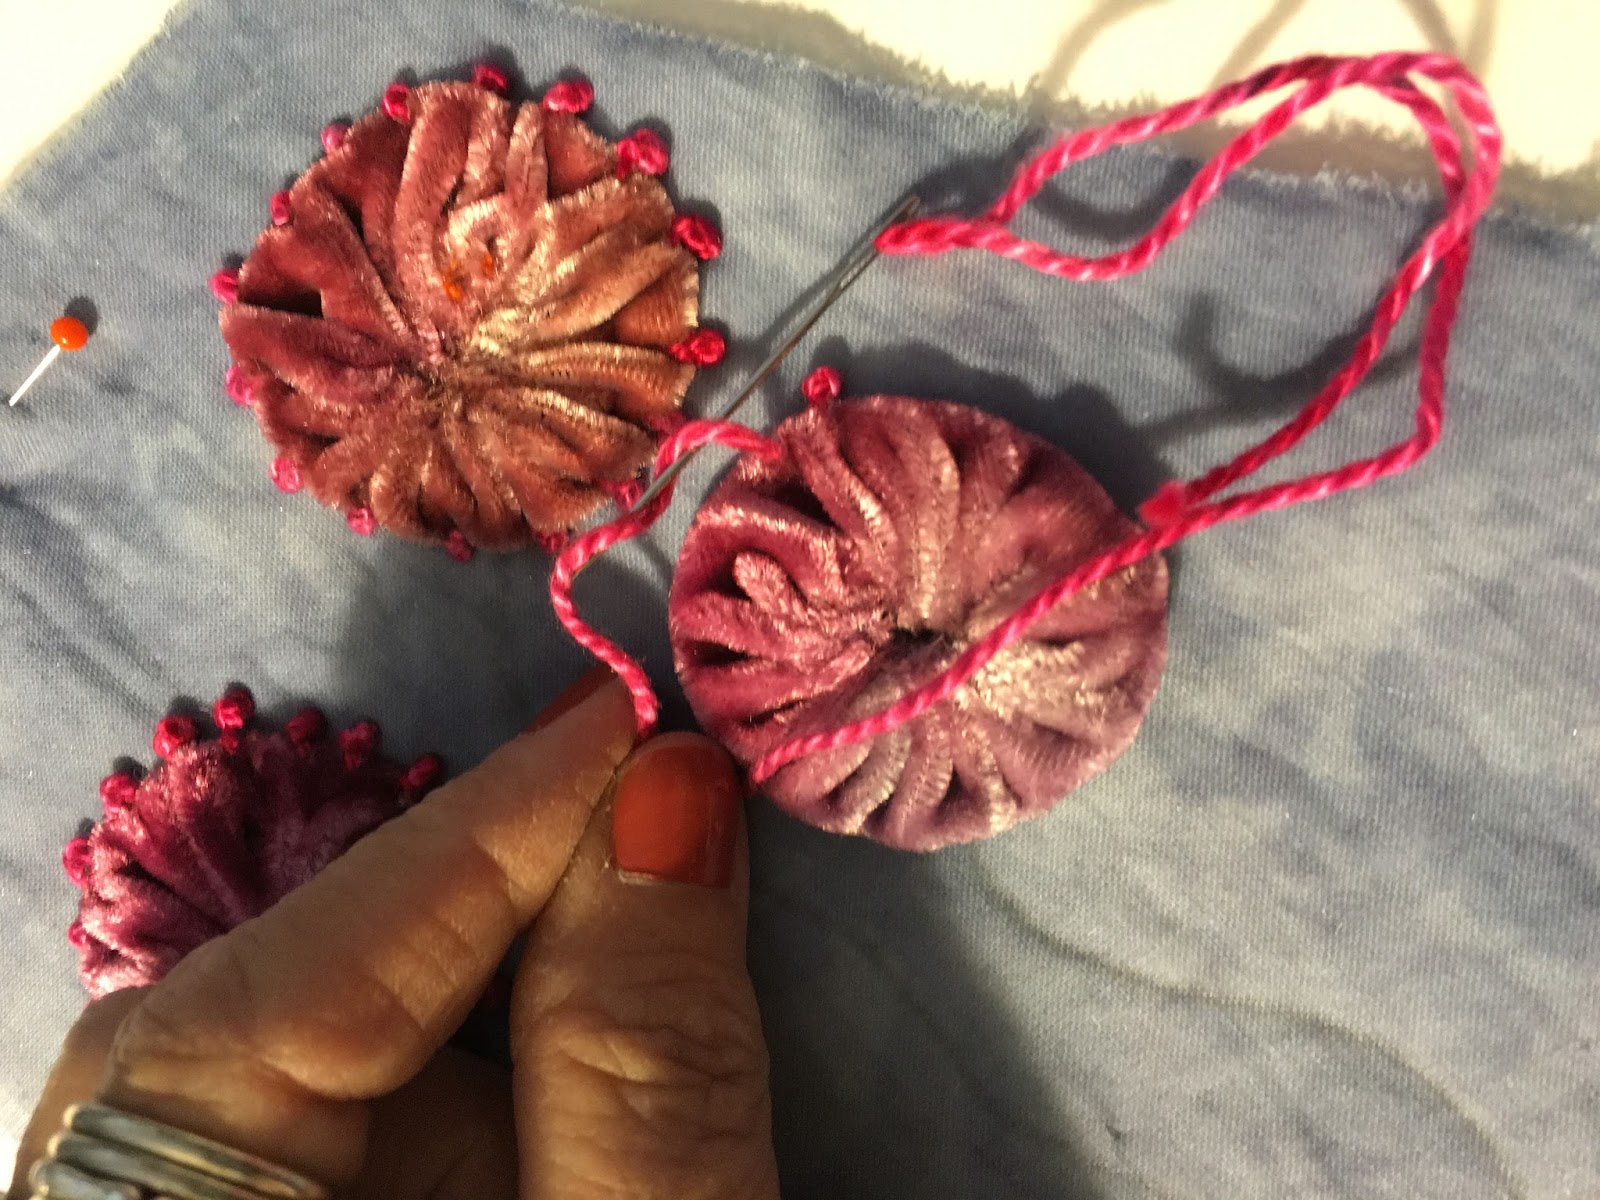
Step 2: Yo-Yo Flowers
Cut 3 circles 2 - 2 1/2" diameter from silk/rayon hand dyed velvet, again not by my hands, Hanna Silks.
To make this easy cut a square and just round off the corners. Does not have to be perfect.
Stitch a running stitch along the edge of the circle about 1/8" from the raw edge. Do not hem the edge.


For another Yo-Yo option you could make petals. To do this when you take the thread to the back of the yo-yo, knot the thread. Next, wrap the thread from underneath over the outside edge and take the thread back through the center. Knot the thread again. Repeat this however many times you like. See the pics below.


Attach the flower to the background fabric. Sew the flower in the center just to hold it on. Next stitch Pistil Stitches (French Knot with a tail) around the edge of the velvet flower.


Beautiful!!!
ReplyDeleteLove those yoyos in silk rayon. Thanks for showing how you made them.
ReplyDeleteThe Silk/Rayon velvet is amazing to work with! And I do sell it if you are ever interested and can't find it near you. Thanks!
DeleteLove this idea and perfect timing for me thank you!
ReplyDeleteWe are making A5 size Hope Flags for a club exhibition next year which are to hang in Beverley Minster in East Yorkshire.
Because they will hang above visitors in banner form, we must make them interesting on both sides so I'm going to incorporate your natty yo yo flowers :)
You're welcome! I'd love to see what you do with the Hope Flags! Sounds wonderful!
DeleteWhat fun!
ReplyDeleteWonderful! I have been wanting to make some prayer flags and this is right up my alley. Thank you so much for sharing.
ReplyDelete