Tuesday, April 5, 2016

Ice dyeing with resists

Hi, Lynda here. Oh, how I love ice dyeing. This month I'll be posting about adding resists to this fun technique. But first I'd like to give you a little history on ice dyeing.

Several ice dyed fat quarters


Back in 2010 I was writing a column for our newspaper about local artists. I had always been into arts and crafts, but never dyed anything until after I interviewed Karen, a fabric artist. As soon as I walked into her studio, I fell in love with her bolts and bolts of snow dyed fabrics. Winter was approaching, so I ran out to our local Blick's and bought several fiber reactive dyes, fabric, and other supplies. In January 2011, I snow dyed my first fabrics. I loved the results, but then the snow was gone. I remembered that Karen had made her snow with a snow machine when snow wasn't available. I thought instead of making snow with ice, why not just use ice cubes.  I googled ice dyeing and dyeing with ice, but couldn't find any information on it. I decided to go ahead and try it, and was so excited with my results. This is my very first ice-dyed piece, "Mayo's Garden." I mounted it on canvas and hung in my studio to remind me of what started me on this journey. 

Mayo's Garden hanging in my studio


After writing a blog post about my experiences, I queried Quilting Arts about writing an article about ice dyeing, and ended up writing the first article on the technique in the August/September 2011 issue. Since that time the technique has taken off and fabric artists all over are creating such lovely fabric. I definitely don't consider myself "queen" of ice dyeing, but think of myself as "mother" of it!

If you have never ice dyed, I taped a webinar in 2013 for Quilting Arts that is still available. You can see it here. You can see my very first tutorial on my blog here. I'm also working right now on Icy Delights, my online class all about this wonderful technique. I'll be talking more about the class later this month before it goes live.

So for this month, let's talk about resists. The first one is clothes pins. I absolutely LOVE using clothes pins whether I'm ice dyeing, low immersion dyeing, or in my easy and fast silk scarf dyeing classes where we use instant set dyes.

For this piece I used Cerulean Blue, Fuchsia, and Golden Yellow.


It looks difficult, but it's just fan folded and then clipped with clothes pins.


 I also did an experiment with this folding and clipping and using the same dyes, but didn't ice dye. I just put dye on the fabric without using ice and here is the result. It's pretty, but doesn't have the texture you get with ice.


Here is my thrift store shirt that I folded and clipped the same way.


I also dyed my hubby a shirt.


And a silk scarf.


This is just one type of resist. You could also use rubber bands or hemostats, to name a few. There are so many different ways to get more texture. Ice dyeing gives such beautiful results and adding resists just bumps up the beauty. See you next week for another resist I love to use with ice dyeing.

Thursday, March 31, 2016

A Sampling of Block Printed Art Quilts

In my last post I promised that I would conclude my stint as the March artist by showing off some of the quilts that I’ve made (alone or collaborating with other artists) using wooden printing blocks.

Several years ago Artistic Artifacts hosted the talented British textile artist Jamie Malden, owner of Colouricious, for a block printing workshop. Jamie’s time in town coincided with a visit from Liz Kettle of Textile Evolution, and so we dedicated some time to work collaboratively. Liz titled her blog post about this creative event “3 Artists + 3 Days = Creative Frenzy” — very apt!

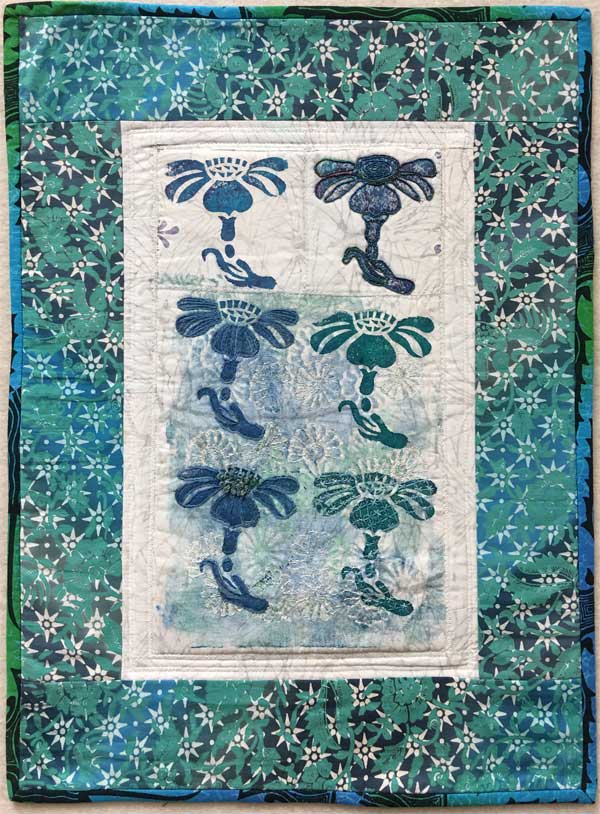
The below quilt was created using the WB12 Orchid block and was bordered and bound with two of our Combanasi batiks, which feature silk screen motifs with traditional batik techniques (view larger image).

Several of the orchid prints were embellished with a variety of hand-stitches using Tentakulum Handpainted Fibers: see detail photo below.

Our dragonfly quilt features a print from the WB212 DragonflyDragonfly in Wetland square block as the center, accented with hand-dyed fibers and trim. It’s bordered by hand-dyed fabric block printed with a variety of paisleys and florals. (View larger image)

The below quilt uses our large leaf block with white PROfab Opaque Textile Paint, printed atop fabrics that were monoprinted using stencils, bubble wrap and more on a Gelli Arts™ Gel Printing Plate (view larger image). If you haven’t experimented with monoprinting on a Gelli plate, I want to encourage you to give it a try — such a fun surface design technique!

We used this quilt as the backdrop for our prize package photo. The center is the WB213 Primitive Peacock block on monoprinted fabric, surrounded by fabric collage (monoprints, stamped, etc.) and stitched to a hand-dyed vintage linen piece. The base of this quilt is a hand-dyed commercial black & white fabric; I collect black & white fabrics specifically to dye them! The quilt was accented with beading (view larger image).

In my last post I gave you a glimpse of working on Lutradur to create snowflakes. Visit the Artistic Artifacts blog to learn more about the creation of this quilt. Below is the finished quilt (view larger image).

The below is the final assembled result that came after I was inspired by a demonstration during one of our monthly art group meetings. That demo led to a LOT of new fans of the process, all putting their own spin similar little hand-stitched quiltlets.

While I did make some new pieces for this one, the majority of the block prints were collected from the many, many wood block demonstrations I’ve held over the years; in my shop, at quilt shows, etc. I really enjoyed giving these a ‘home’ and having the individual pieces be a portable hand-stitching project (until the final stitching together). Visit the Artistic Artifacts blog for more on my Slow Stitched Outsider Art Quilt, including links to tutorial videos by Teesha Moore.

Last Chance: Leave a Comment for Your Opportunity to Win!

One lucky U.S.-based winner will be randomly drawn from the list of all who have commented on these March block printing postings. Comments will be tallied here on The Printed Fabric Bee blog, as well as on my Artistic Artifacts blog.

My prize package is pictured above: a gorgeous circle design wooden printing block, a foam printing mat, and a jar of PROfab Opaque Textile Paint in the color True Blue.

BUT, if you live near Artistic Artifacts, or are willing to travel to us, you instead have the option to attend my Woodblock Printed Art Quilt class on June 11 for free if you prefer!

The winner will be drawn and notified on Tuesday, April 5th. Good luck to everyone! I’ve enjoyed sharing my wooden printing blocks enthusiasm with you all.

Friday, March 25, 2016

Creating and Embellishing Block Printed Textiles

Moving beyond my basic demonstration using cotton fabric and textile paint included in my last post, I’m showing additional possibilities for producing surface design textiles using wooden printing blocks, as well as how to embellish them.

Silk is a beautiful fabric to block print on. Liz Kettle of Textile Evolution (pictured printing above) was featured in the 2014 issue of Quilting Arts Holiday with a silk scarf printing tutorial. View her gorgeous results below.

Another textile to block print onto is Lutradur. Lutradur is a a spun-bond synthetic material...somewhat like a cross between paper and fabric. Below, I printed snowflakes onto Lutradur to use as a dimensional element for a quilt and used a heat tool to cut them out (learn more).

Instead of using textile paint, I have also had great results using Memento Luxe Mixed Media Ink Pads by Tsukineko. Memento Luxe is a fade-resistant ink that can be used on any porous surface: paper, fabric, wood, leather and more. It’s permanent on fabric when heat set, and the color remains even after repeated washings.

Plus, because these Memento Luxe inks are thick and stay wet for a time, I was able to experiment with adding embossing powders for texture (another example below using Metallic Embossing Powder in gold).

Visit the Artistic Artifacts blog for a past posting/tutorial with more on using Memento Luxe and embossing powders with wooden printing blocks.

Also by Liz Kettle, the mermaid featured on the cover of this amazing fabric collage journal pictured belowl was block printed onto white leather using Memento Luxe ink. (The block is WB219 Mermaid with Star; it’s currently out of stock but email me and I will put you on the wait list for the next shipment, hand-carved from India!)

The below sample illustrates a fun embellishing option. I used the WB110 Leaves and Stems block, (full of cool funky details), and then began filling in the pattern using several options more traditionally suited to paper arts.

From the top, I used, Derwent Inktense Watersoluble Ink Pencils, Stamper’s Big Brush Pens (by Faber-Castell; these pens contain permanent India Ink) and Gelly Roll Moonlight Pens. I can definitely see further embellishing and fussy cutting pieces of this fabric to use in an art quilt. (Note, I ironed this fabric to heat set the products.)

Also from the paper arts world, we have experimented with using Gelatos on our wooden printing blocks. My colleague Sharon McDonagh is well-known for her love of Gelatos around here, and was the first to give this a try. As she wrote, “Rather than risk it with Judy’s extensive stash, I first tried this with my own block, a mermaid....I realized that with the Gelatos’s stick form and thick consistency, I could color areas of the block selectively. Painting selectively is hard to do when using textile or acrylic paint on your block, as by the time you get to one area, the paint is drying up elsewhere.” She originally experimented on paper (below the print is the wooden printing block used to create it).

We have since printed on a variety of fabrics. Below, a mermaid block print by Beth Richardson using Gelatos on Roc-lon® Roc-rol™ Multi-Purpose Cloth™. Visit the Artistic Artifacts blog for Exploring the Possibilities of Gelatos: Part 2, which gives you a lot more information about using Gelatos with wooden printing blocks.

So as seen here, you can block print onto a variety of surfaces, and use a variety of paints and colorants. Embellishing your printed textile just continues your fun!

I love stitching, so when thinking about adding to a block print, the go-to choice for me is to hand stitch the motif. Using Modern Hand Stitching by Ruth Chandler for my inspiration, one of the birds (printed with a WB213 Primitive Peacock block) in my fabric above was stitched with Tentakulum Handpainted Fibers directly following the design. In the detail photo below, you can see that I couched Tentakulum Gimpe as an outline and then filled in with various stitches using Tentakulum’s cotton 6 strand floss (Mouline) Embroidery Floss.

Visit the Artistic Artifacts blog for more on block printing and hand stitching, including how I prepare my block printed fabric for stitching. For those of you out there who love to free motion quilt, how about using your sewing machine to add stitching?

Another beautiful way to embellish your block prints is with beading. (I printed this using the WB332 Spoked Geometric Circle block.) Use the motif to guide your beading, as you can see in the close-up photo above, or bead your own complementary design!

By the way, in my opinion the best beading reference book out there is First-Time Beading on Fabric by Liz Kettle. Don’t let that title fool you: this book is an ideal resource for everyone interested in beading on fabric.

We’d love to see how you use your wooden printing blocks and embellish your printed fabric! We welcome your postings with photos either on the Artistic Artifcacts Facebook page or on The Printed Fabric Bee Facebook page.

My final post next week will show you some of my finished quilts that feature block prints!

Leave Your Comment to Enter Our Random Prize Drawing!

My prize package will go to one lucky U.S.-based winner randomly drawn from those who have commented on my March block printing postings (whether here on the The Printed Fabric Bee blog, or on my Artistic Artifacts blog. I have gathered a gorgeous circle design wooden printing block, a foam printing mat (this work surface is essential to get the best printing results), and a jar of PROfab Opaque Textile Paint in the color True Blue as my prize.

But if you are local to the Virginia/DC/Maryland area (or are willing to travel) and your name is selected, you can instead choose to attend my Woodblock Printed Art Quilt class on June 11 for free!

Tuesday, March 15, 2016

Block Printing with Hand-Carved Wooden Printing Blocks

Hello everyone! I’m Judy Gula of Artistic Artifacts in Alexandria, VA, and I'm happy to represent the month of March for The Printed Fabric Bee in 2016. The focus of my posts this month will be on Block Printing for art quilts and other fiber projects.

Edited 3/22 to add:U.S. residents who leave a comment here at the Printed Fabric Bee — or at my Artistic Artifacts blog — on any of my block printing posting in March, are eligible to win a prize (see more about this at the end of this post).

Block printing is one of the most ancient forms of decorative art. We carry a very wide range of wooden printing blocks in our shop. These blocks are hand carved in India and are part of our free trade products: we are proud to be a part of the support of 40 families in India!

For my first post, I’m including a video below that was taped while I was running my on-site “pop-up” shop at the recent Art & Soul creative retreat in Portland, Oregon. The video begins with me answering a question from my audience: where do wooden printing blocks come from?, and then moves into the basics of how to block print.


While traveling around the US vending at shows and teaching, I hear many of the same questions over and over, so I am using this opportunity, below and in the video, to briefly answer the most common ones.

  1. What type of wood is used?
    The wooden printing blocks are carved out of shisham wood, which is a locally grown, sustainable hard wood.
  2. Will the white paint come off?
    The white marking is there to give the carvers, or as they prefer, Block Makers, visual guidance as to where to chisel and carve the wood away.
  3. How do I care for wooden printing blocks?
    Do scrub them with soap and water once your printing session is over. Use a soft nail brush if necessary to get paint out of the fine lines. However, don’t let your blocks soak in the sink or a container water. I dry them face down on a dry towel.
           Know this: they will never be ‘clean’ again — embrace that! (We find them beautiful with the hints of paint and use; see photo.)
  4. How can I use them?
    .... well, the answer to that is for the next blog post!

My next blog post will give you a few ideas of how to embellish your block printed fabric.

Comment to Win!

In addition to the surface design tutorials posted here on The Printed Fabric Bee blog, each month, the specified artist offers a fabulous giveaway. Simply leave a comment on at least one of the blog posts during that month to be eligible. I have selected a beautiful circle design wooden printing block, an orange foam printing mat (critical to successful block printing), and a jar of True Blue PROfab Opaque Textile Paint as my prize (see below). However...if your name is drawn and you are local to the Virginia/DC/Maryland area (or are willing to travel), you can instead choose to attend my Woodblock Printed Art Quilt class on June 11 for free!

P.S. If you would like to travel to India and meet the families who carve our wooden printing blocks, visit the Colouricious website in England to learn about the Textile Trip of a Lifetime!

Friday, February 26, 2016

Colour It Fuse It! - II

Let's get on with some fun stuff now! I showed you how to paint on the fusible web and interfacing.Here's some pictures of some other painted items:

This is one where I chose some colours based on the background fabrics.

Here's one where I painted the flowers onto the fusible. You can see in the quilt below that the transparency of the web adds interest to the quilt.


I also added fancy threads when I was fusing the painted web to the quilt. The stitching helps to keep the threads in place.


 Just to show how I placed the threads over and under the fusible before pressing them in place.

This one has lots of beads added, after the quilting.

Here's a couple of ideas for adding interest to your work as well, these work best on interfacing or stabilizer.

I've added some gold foil, stamping, and Thermofax printing!

Now here's a project that is quick and fun for you:
Gather up some of the pieces you've painted and cut them into strips. Add a few coordinating fabric strips as well.
Lay the strips over  a piece of fusible stabilizer (fusible side up) and weave the strips in and out. Pin the ends down and press the strips in place. Remember to use an applique pressing sheet or parchment paper.
Having the stabilizer underneath means that it will hold onto all the pieces!
Remove the pins and lay over a matching piece of fabric.
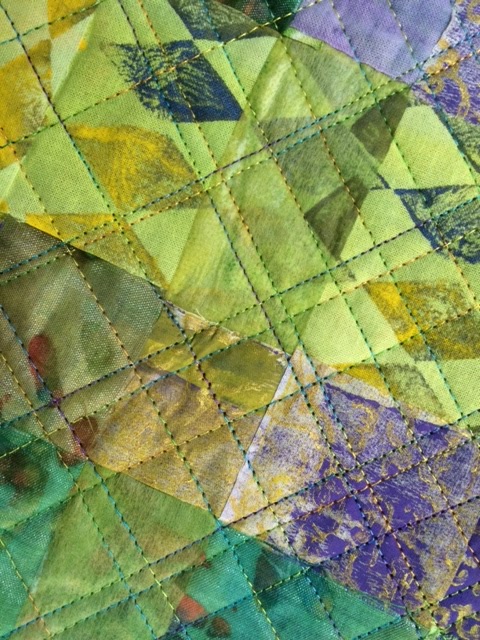
Stitch over top of the weaving to catch all the edges. I prefer a diagonal grid pattern, but you can choose any design you like.
Trim all the outside edges and zig zag stitch 2-3 times in a contrasting threads around all edges.

Fold over the edges to make an envelope, as shown in the photo, and stitch once more to secure.

Add a nice button and fancy thread to close the envelope.

Cute, isn't it! Easy too!
So here's the fun part, if you like these techniques I've shown you, why not leave a comment below and be part of the draw for my NEW DVD from Quilting Arts? On February 29th I'll draw a winner!
Be part of the fun and try out some of the great new ideas that I present! There's lots to choose from!

Now, if you're not a winner, there's another way to get your very own copy! You can go here and order one from Quilting Arts Store: http://www.interweavestore.com/fabric-embellishment-with-color-surface-design-and-more-dvd

Or just for you! I'm offering 10% discount for Printed Bee fans on the DVD in my Etsy shop:
http://tinyurl.com/hbvdpz2

I hope you had fun, I'd love to hear from you...sign up for my newsletter at www.susanpm.com

Sunday, February 7, 2016

Colour It, Fuse It!

Hi everyone and welcome to February! I'm the next person to introduce you to the wonderful world of colour, cloth and more....
This month we'll be working with applying paint and colour to a range of fusible web and interfacing products and doing some really strange and crazy things with them.


This is not your grandmothers fusible web! Join me while I show you how to combine paint, powders and foils with a variety of fusible webs and interfacings to create texture, layering and pattern.

Learn  ways to apply metallic foil for hints of sparkly shine or areas of glitz and glimmer. After cutting, tearing and ripping some of the pieces then time will be spent on building layers of interest with collage and stitch. 

Here are some supplies you will need: 

You will need:

·         2-3 fat quarters of fabric, light to medium value with texture or subtle print. Hand dyes or batiks work well. use these as colour inspirations for the background of your art piece.

·         one fat quarter muslin for backing

·         one  yard paper backed fusible web (NOT Heat and Bond), buy a couple different varieties if they are available

·         1/2 yard each of any variety of fusible and non fusible, woven or non woven interfacings and stabilizers. Try for different weights, maybe even different colours, some are available in black and beige. Avoid the nylon tricot ones.

·         plastic to cover your table

·         paper towels

·         three 1" bristle paint brushes

·         plastic cups for water

·         primary colours (red, blue, yellow) and black of Jacquard Dye-na-Flow™ or Setacolour Silk paints. The heavier textile paints can be thinned down for use as well.

 Now I have a short little video where you'll get to see me and I'll explain a little more about the supplies and you can see the painted effects. Don't pay attention to the workshop blurb at the end, as I have a surprise for you later on this month!


if the link doesn't open, just copy and paste into your browser